
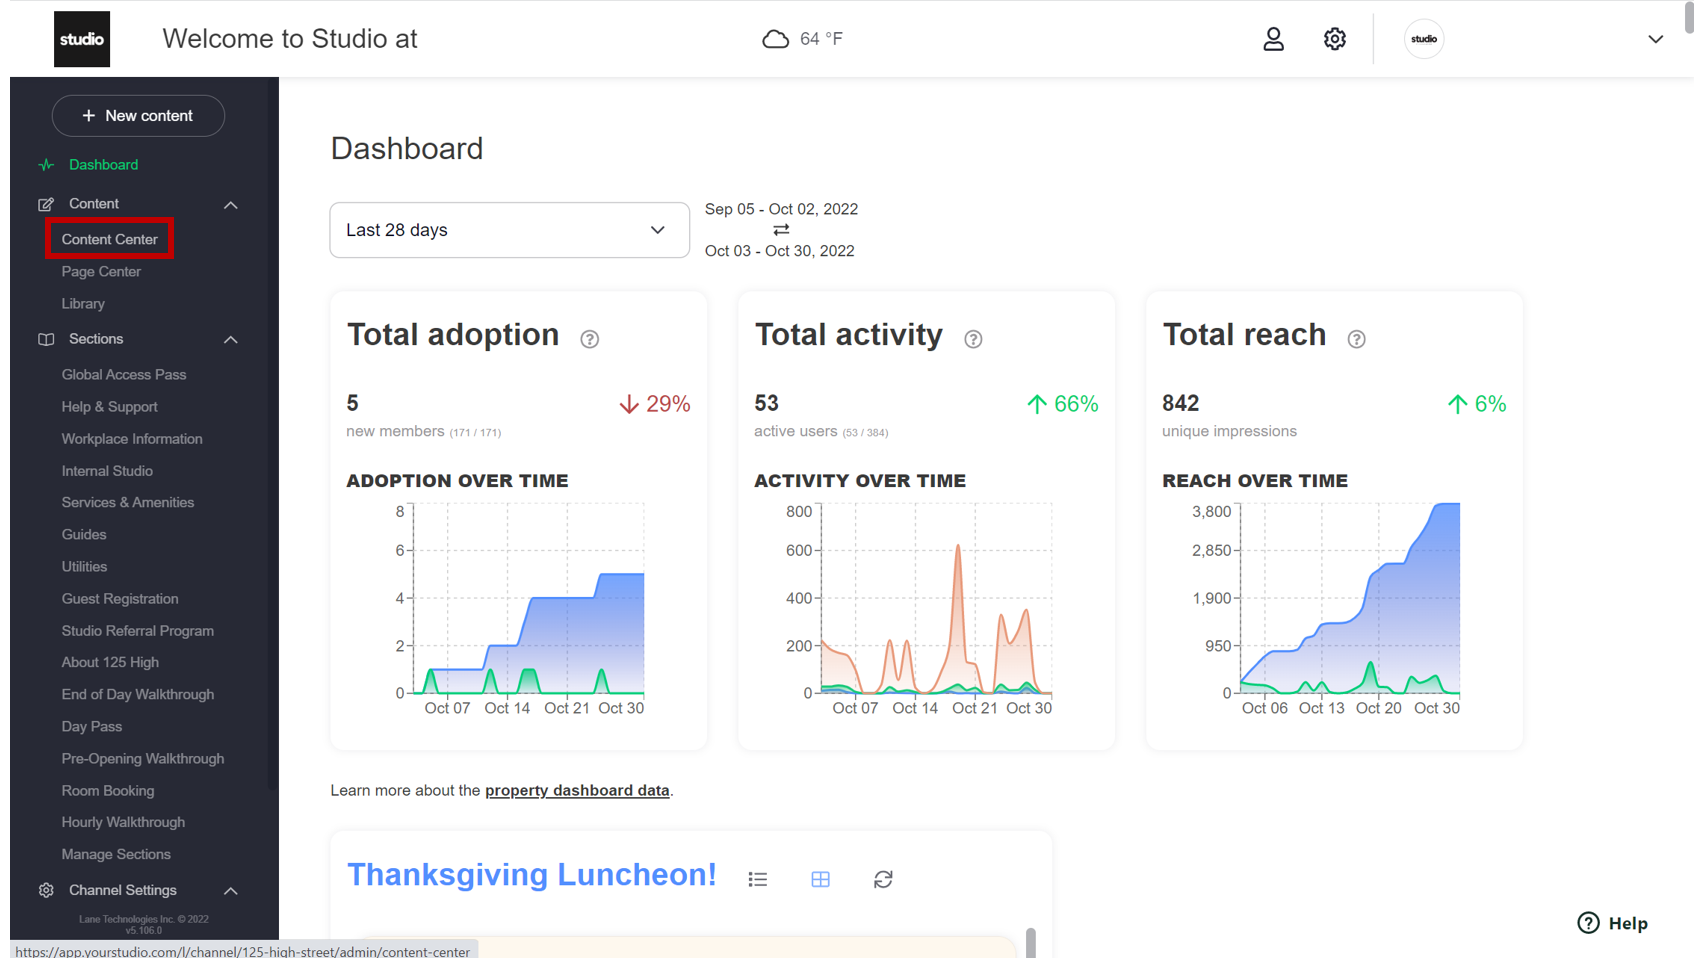
Step 1: From the Lane dashboard, select "Content Center".
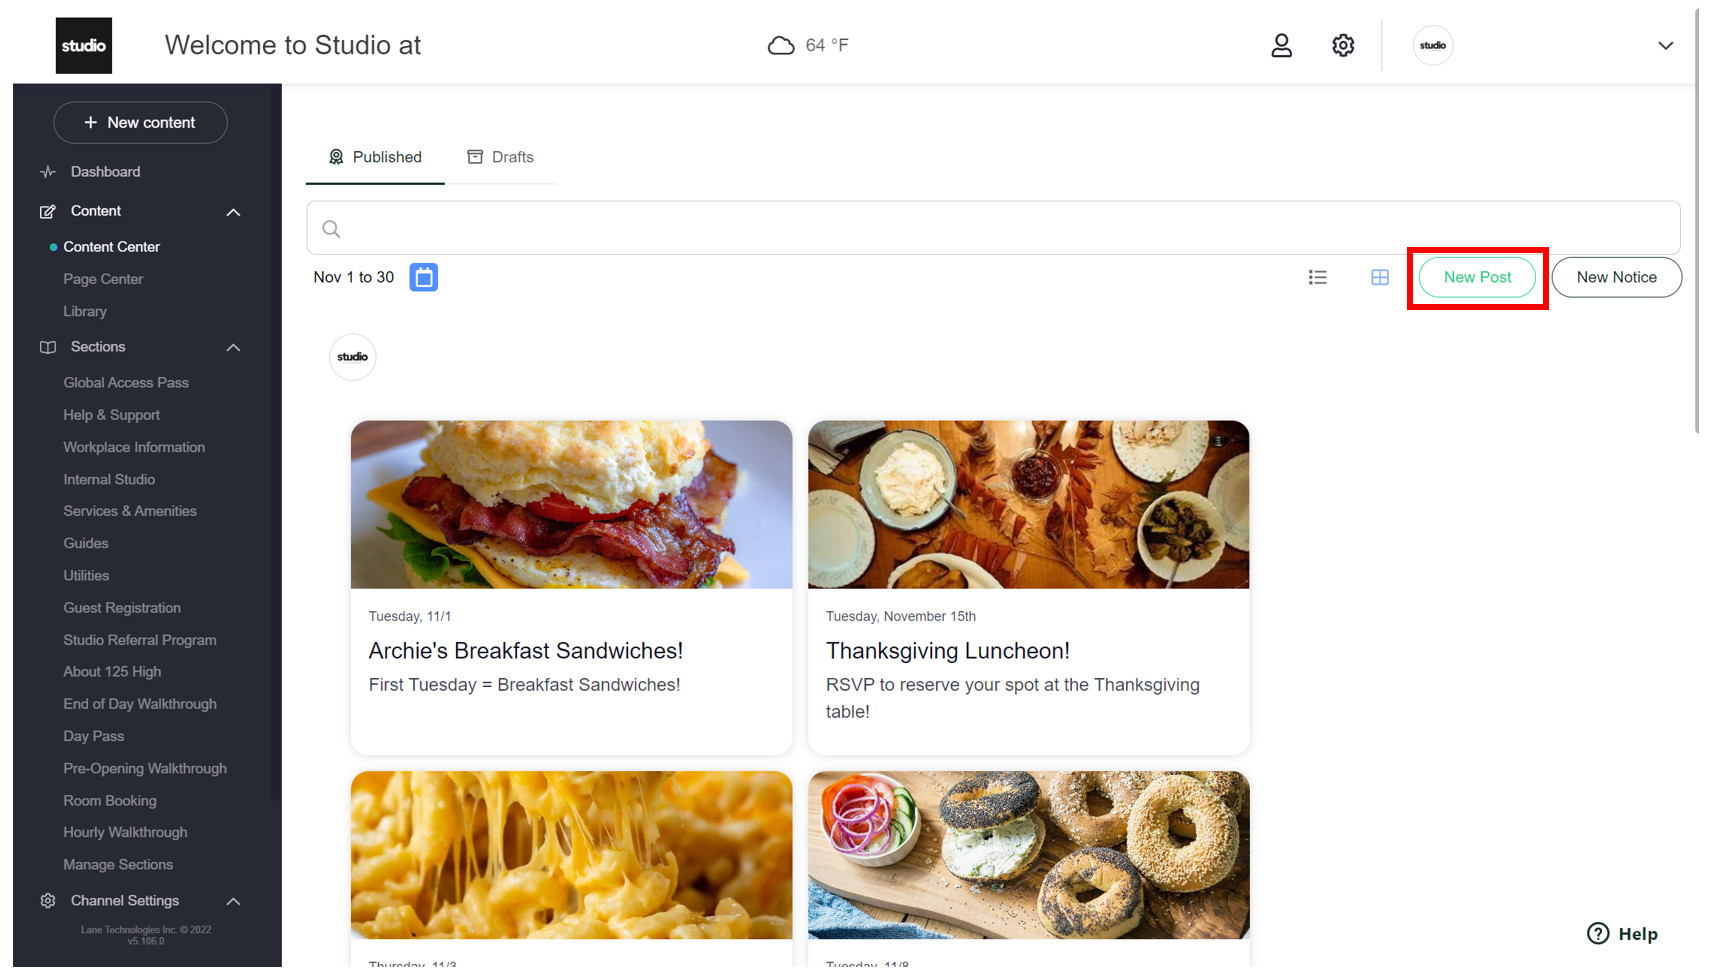
Step 2: Select "New Post" to begin creating your notice tile.
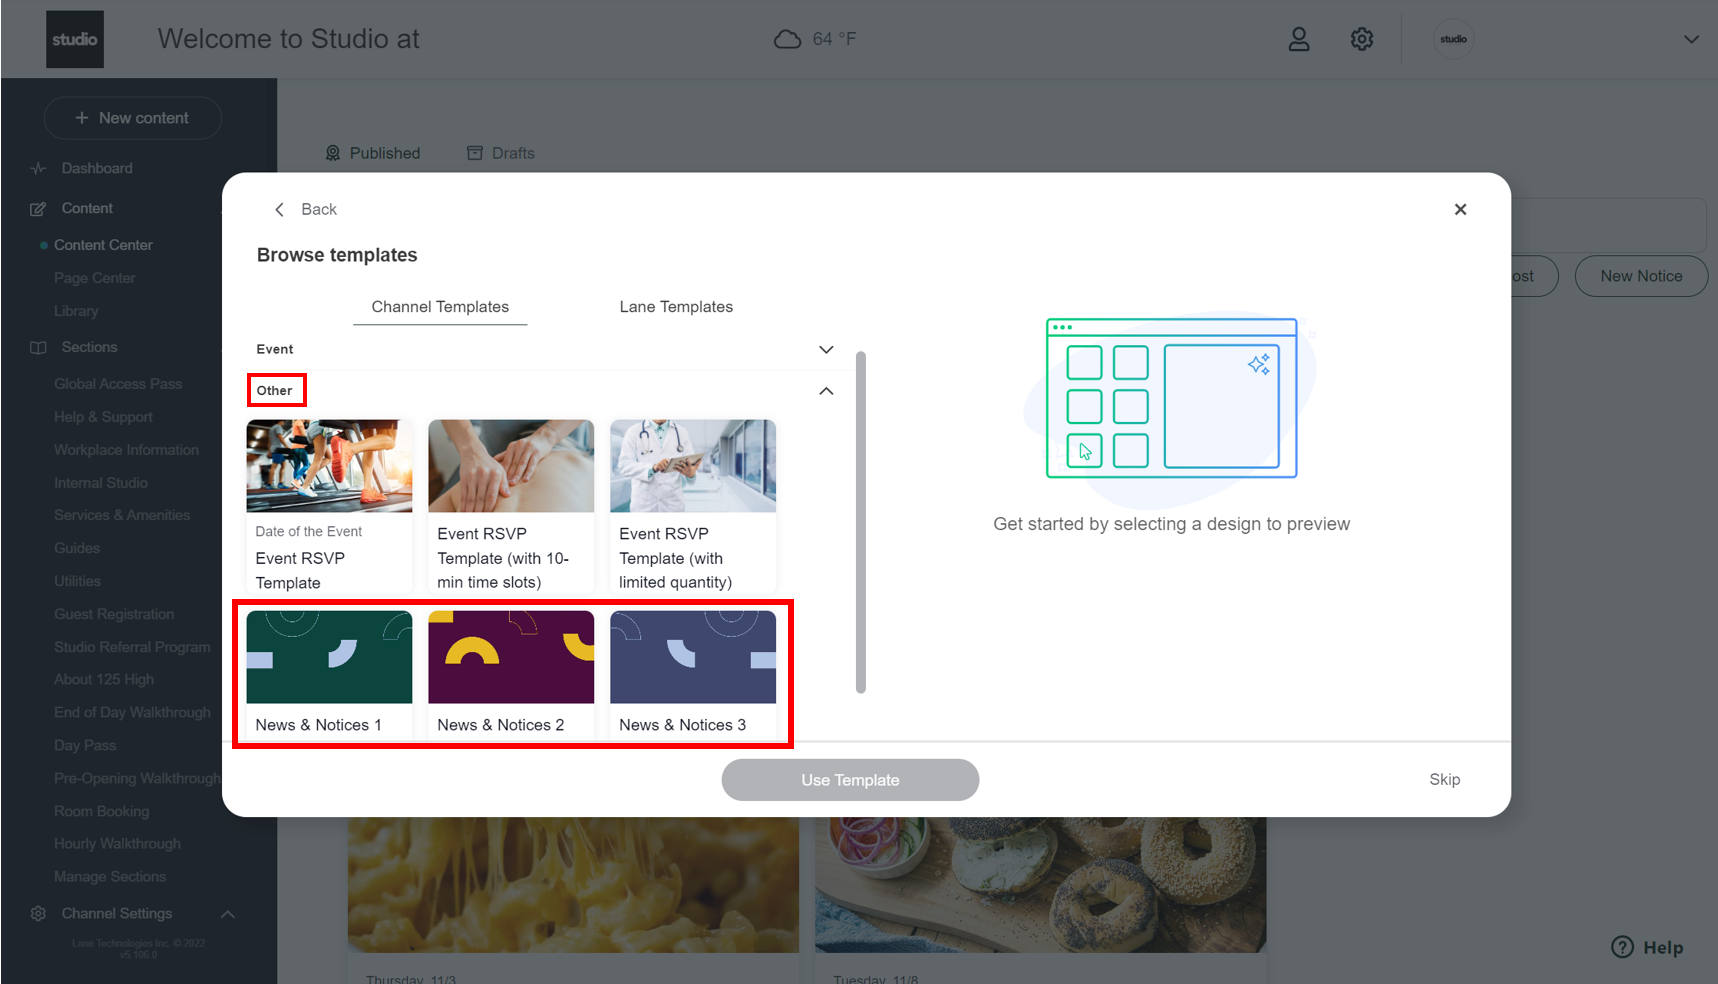
Step 3: View the drop down menus. Select "Other". You'll see three template options for News & Notices. Use the different variations if you're posting multiple notices. Click on whichever template you'd like to use. Select "Use Template".
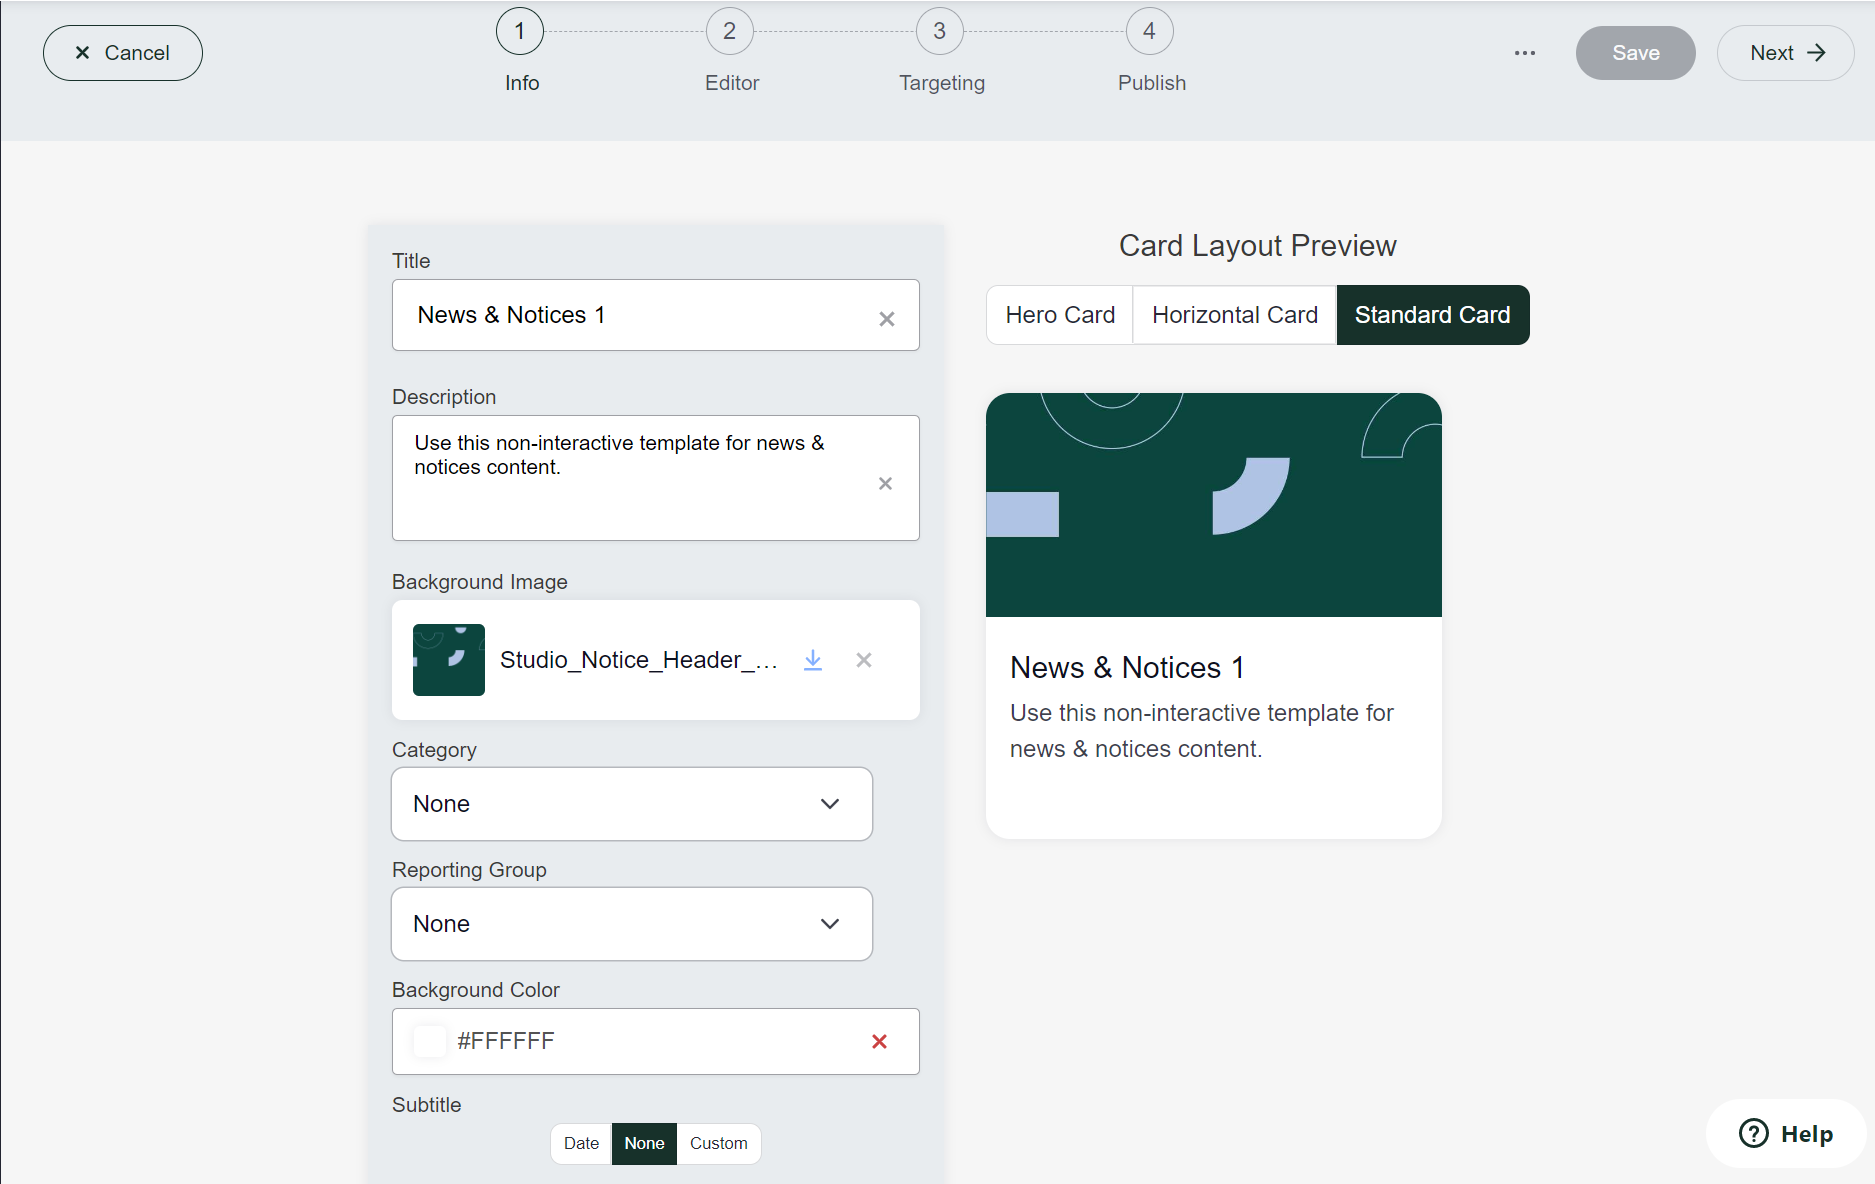
Step 4: You'll edit the tile similarly to how you create an event tile. Section 1 is general info:
-Title: Create a brief title that describes the notice. For example, "Elevator Closure".
-Description: Write a brief description of what the notice is about. For example. "Elevators will be closed this afternoon", or "We apologize for the inconvenience!".
-Background Image: As we move away from the old Studio branding - please replace image with the Studio logo (black background and white lettering)
Step 5: Once "1: Info" is completed, save your work and click "Next" to begin "2: Editor". This is what the member will see when they open the tile for more information, and where we will get a little more in-depth.
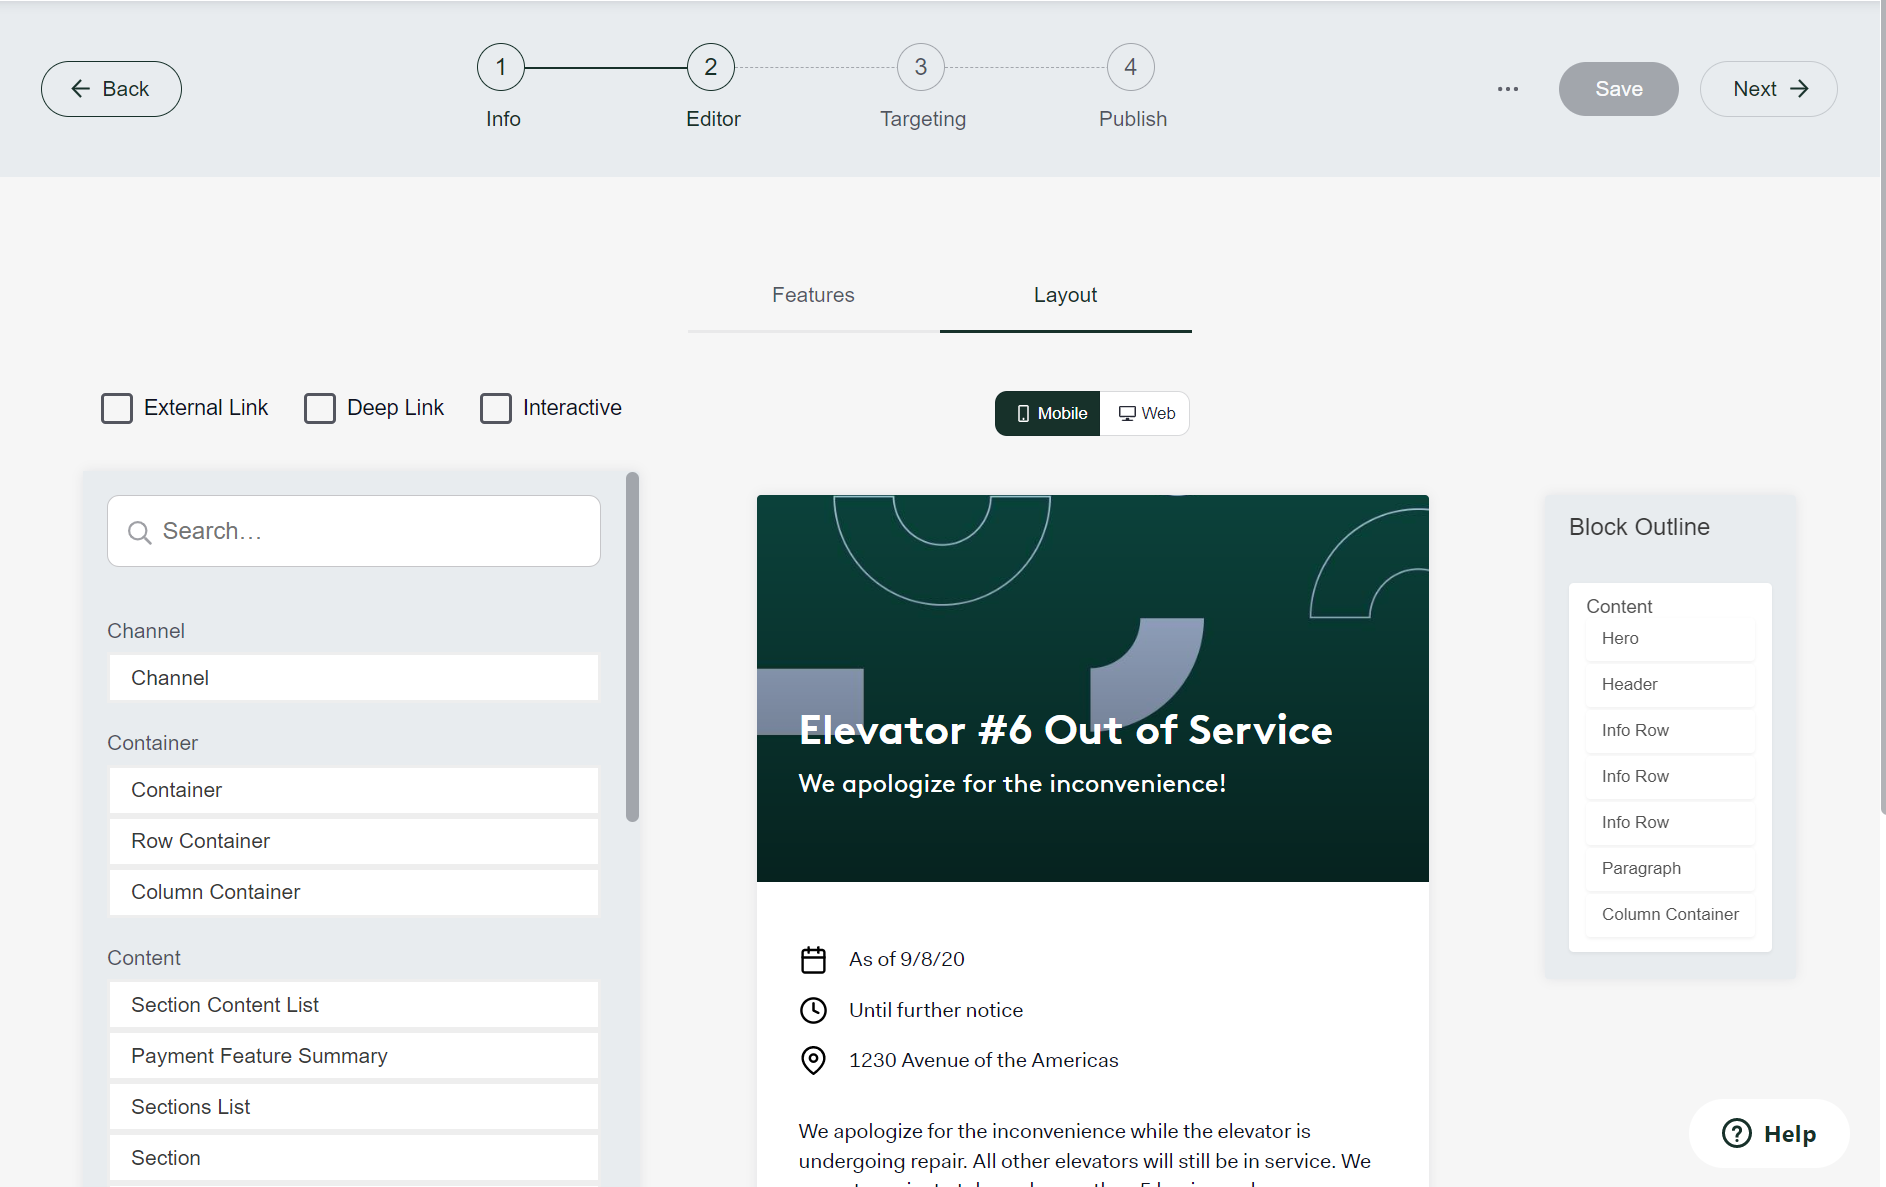
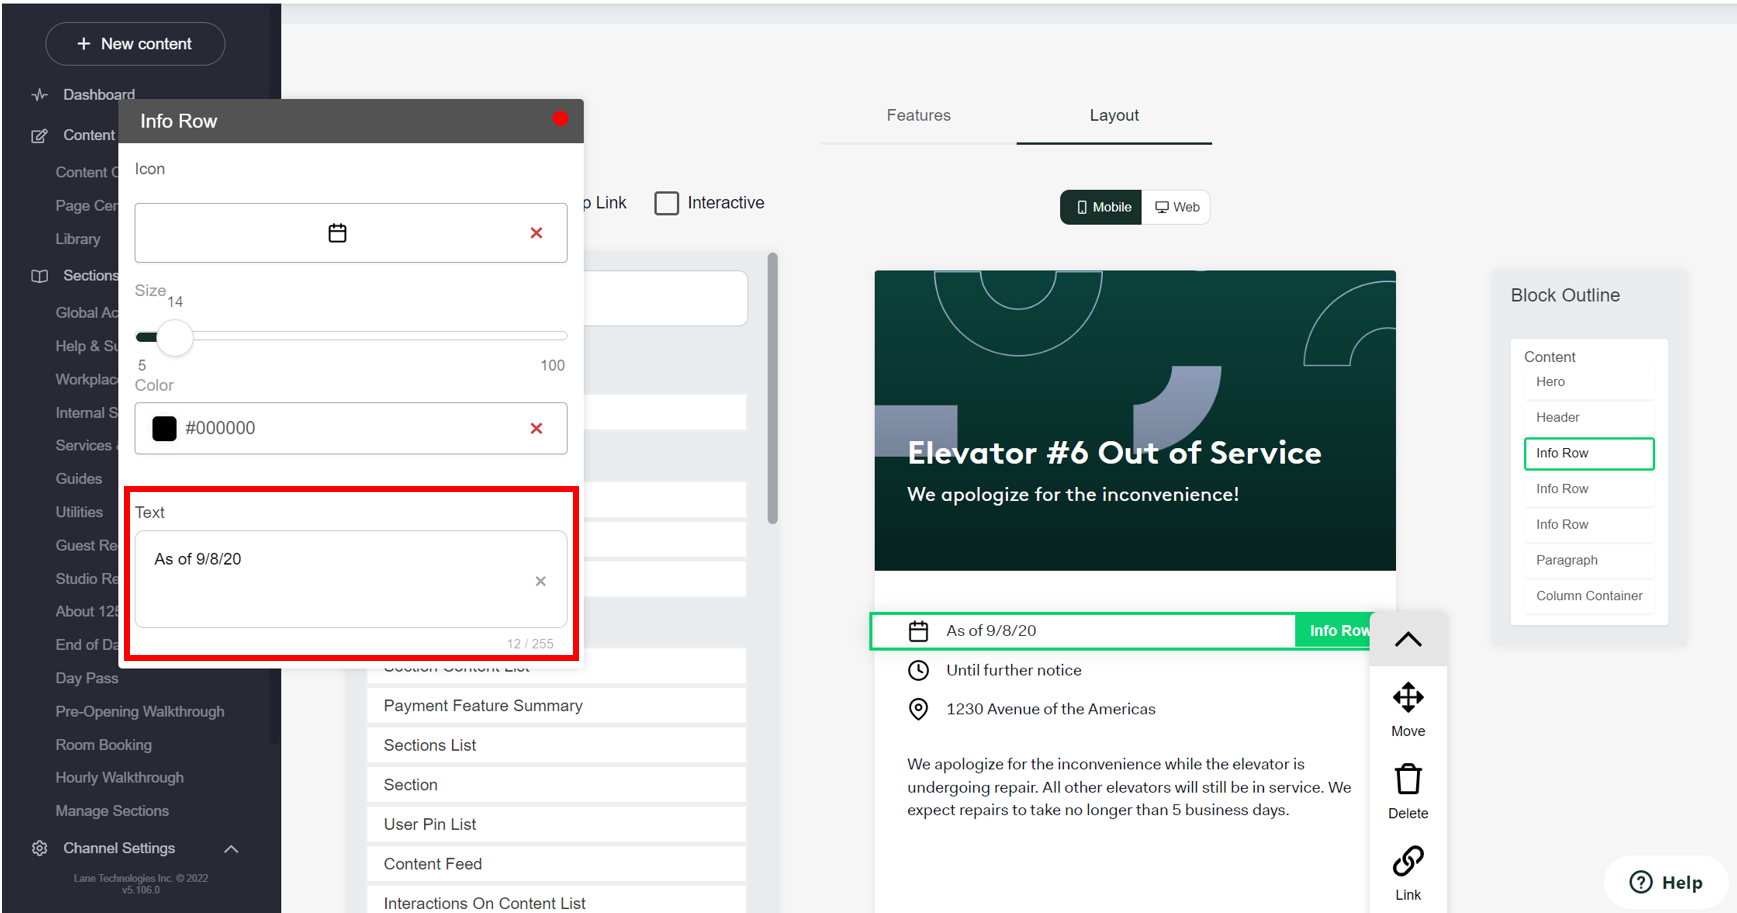
Step 6: To select an info row to edit it, simply click on the text. This will open an editor box where you can type your descriptions such as date range, timing, location, etc.
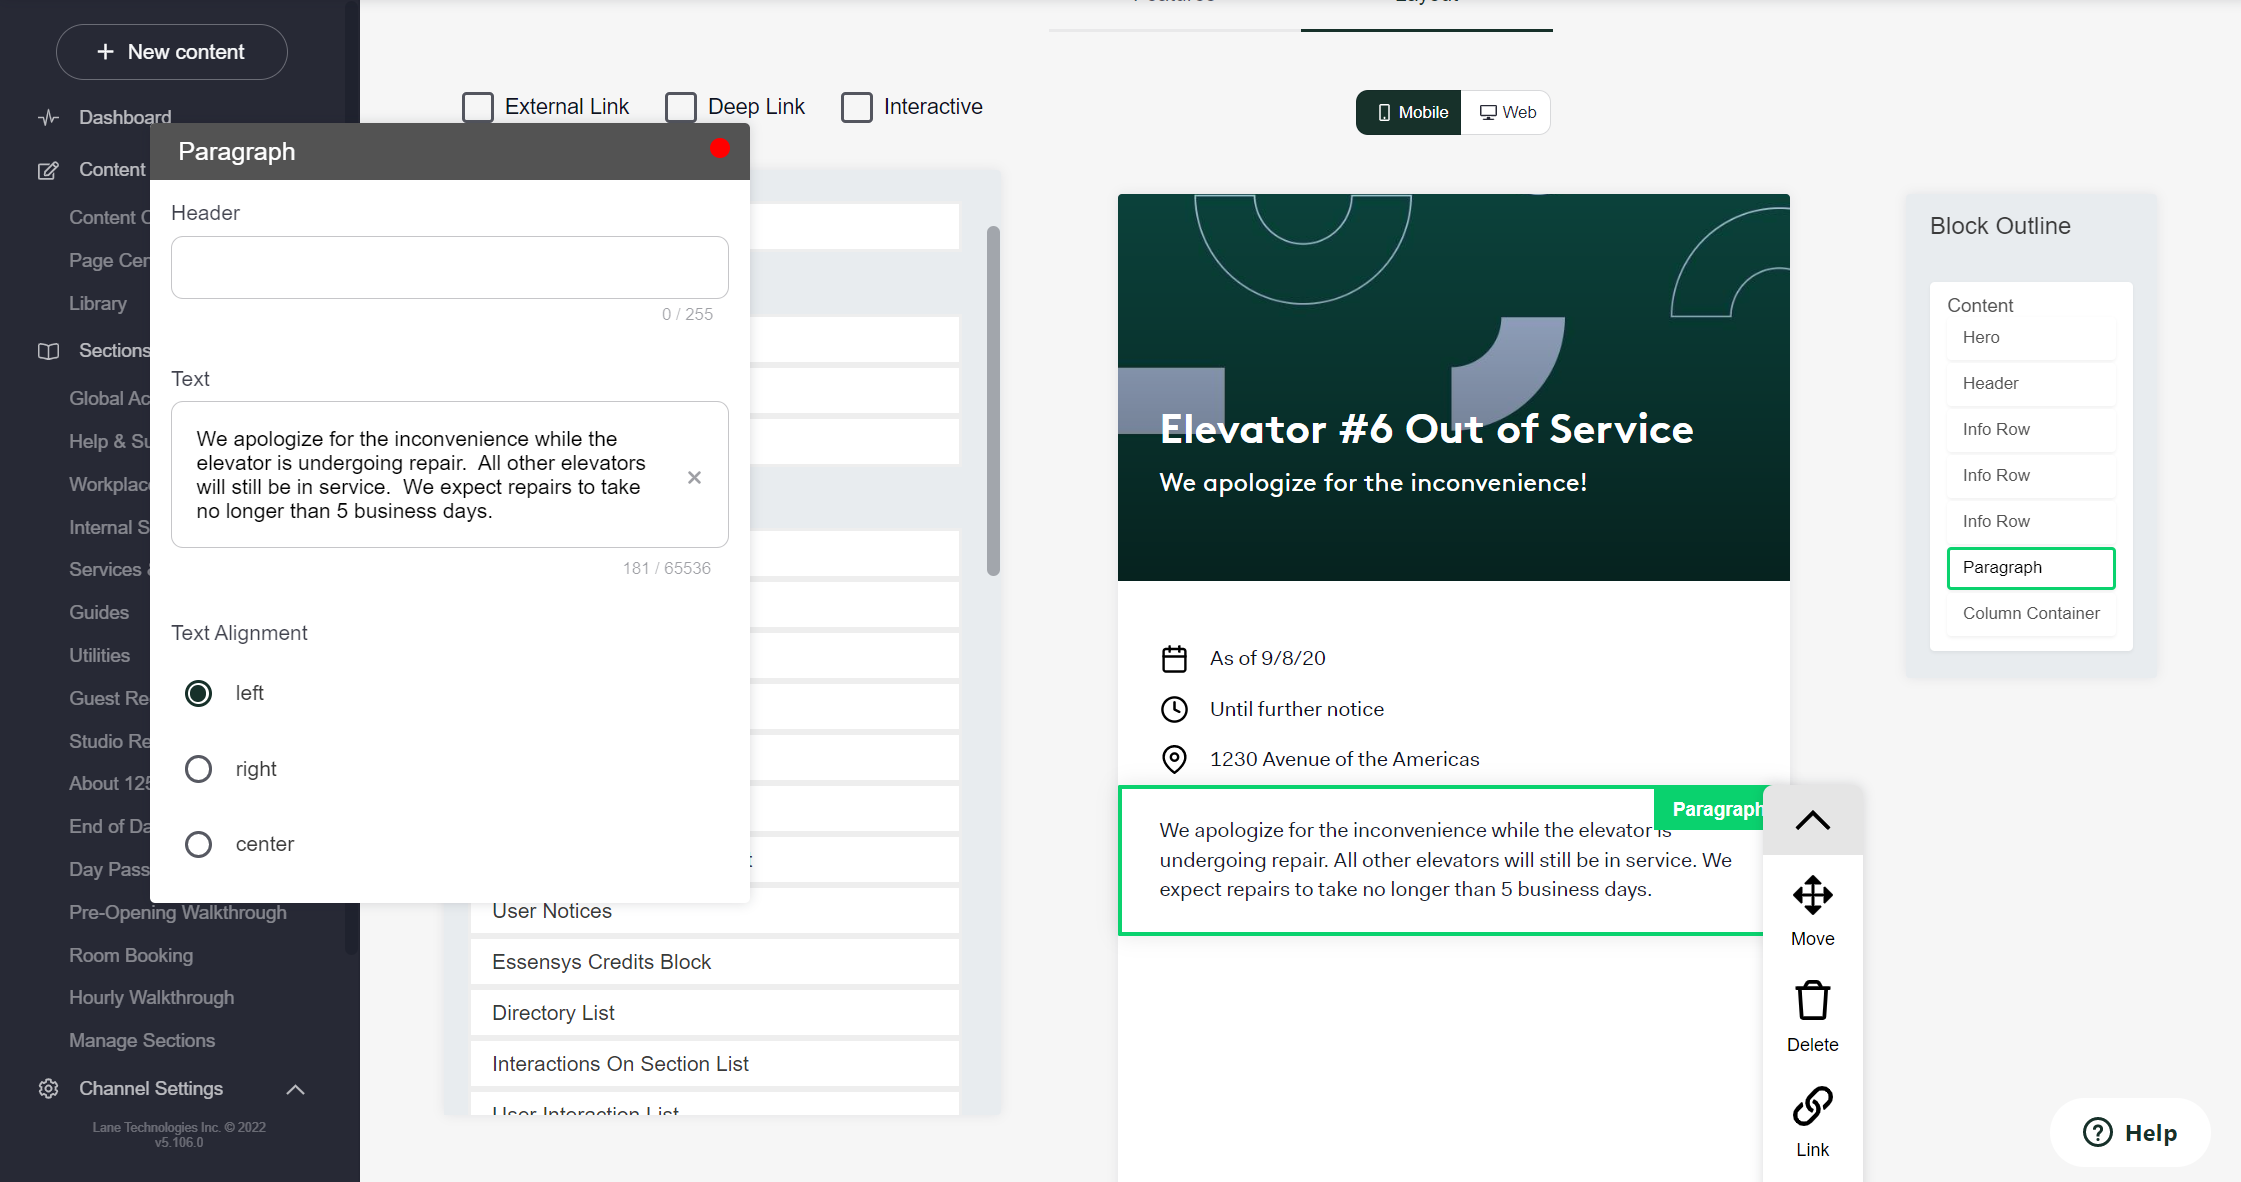
Step 7: Write a more in-depth description of the situation in the paragraph portion of the tile than what you wrote in the first description. This is what members will view when they open up the tile.
Step 8: Once the information looks correct, save your work then select "Next" to edit "3: Targeting".
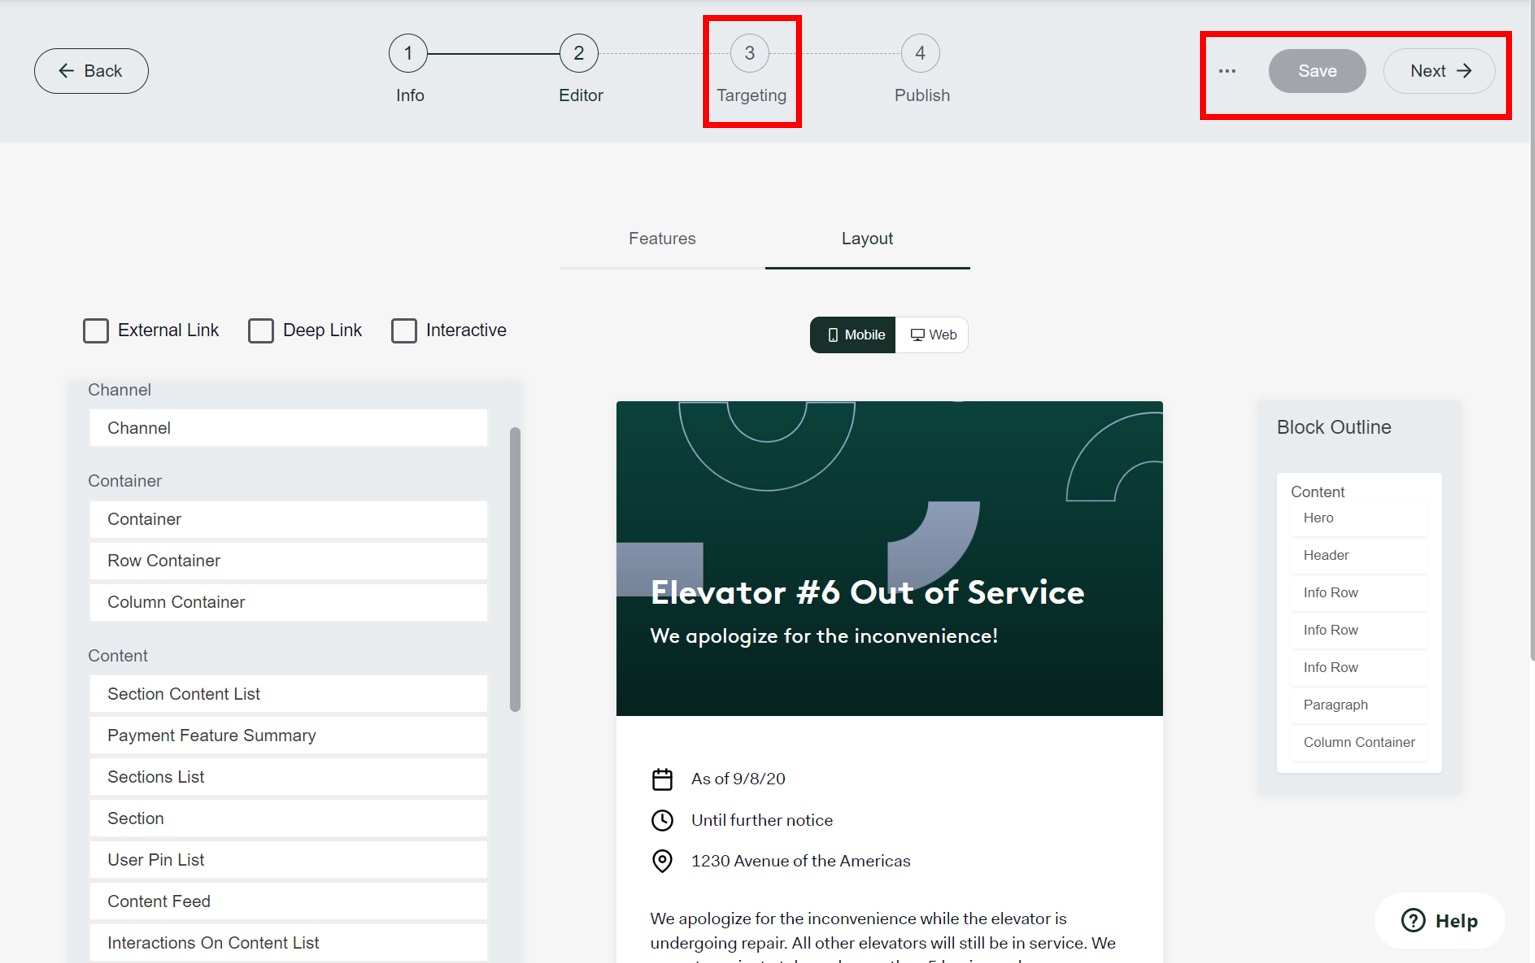
Step 9: This page will allow you to edit the date and time the tile goes live, the date range in which the notice should be posted, and the start and end time. First, select when you'd like the tile to go live by selecting "Goes live at". Then you can add the desired date range of the event or happening on the "Starts and ends" calendar.
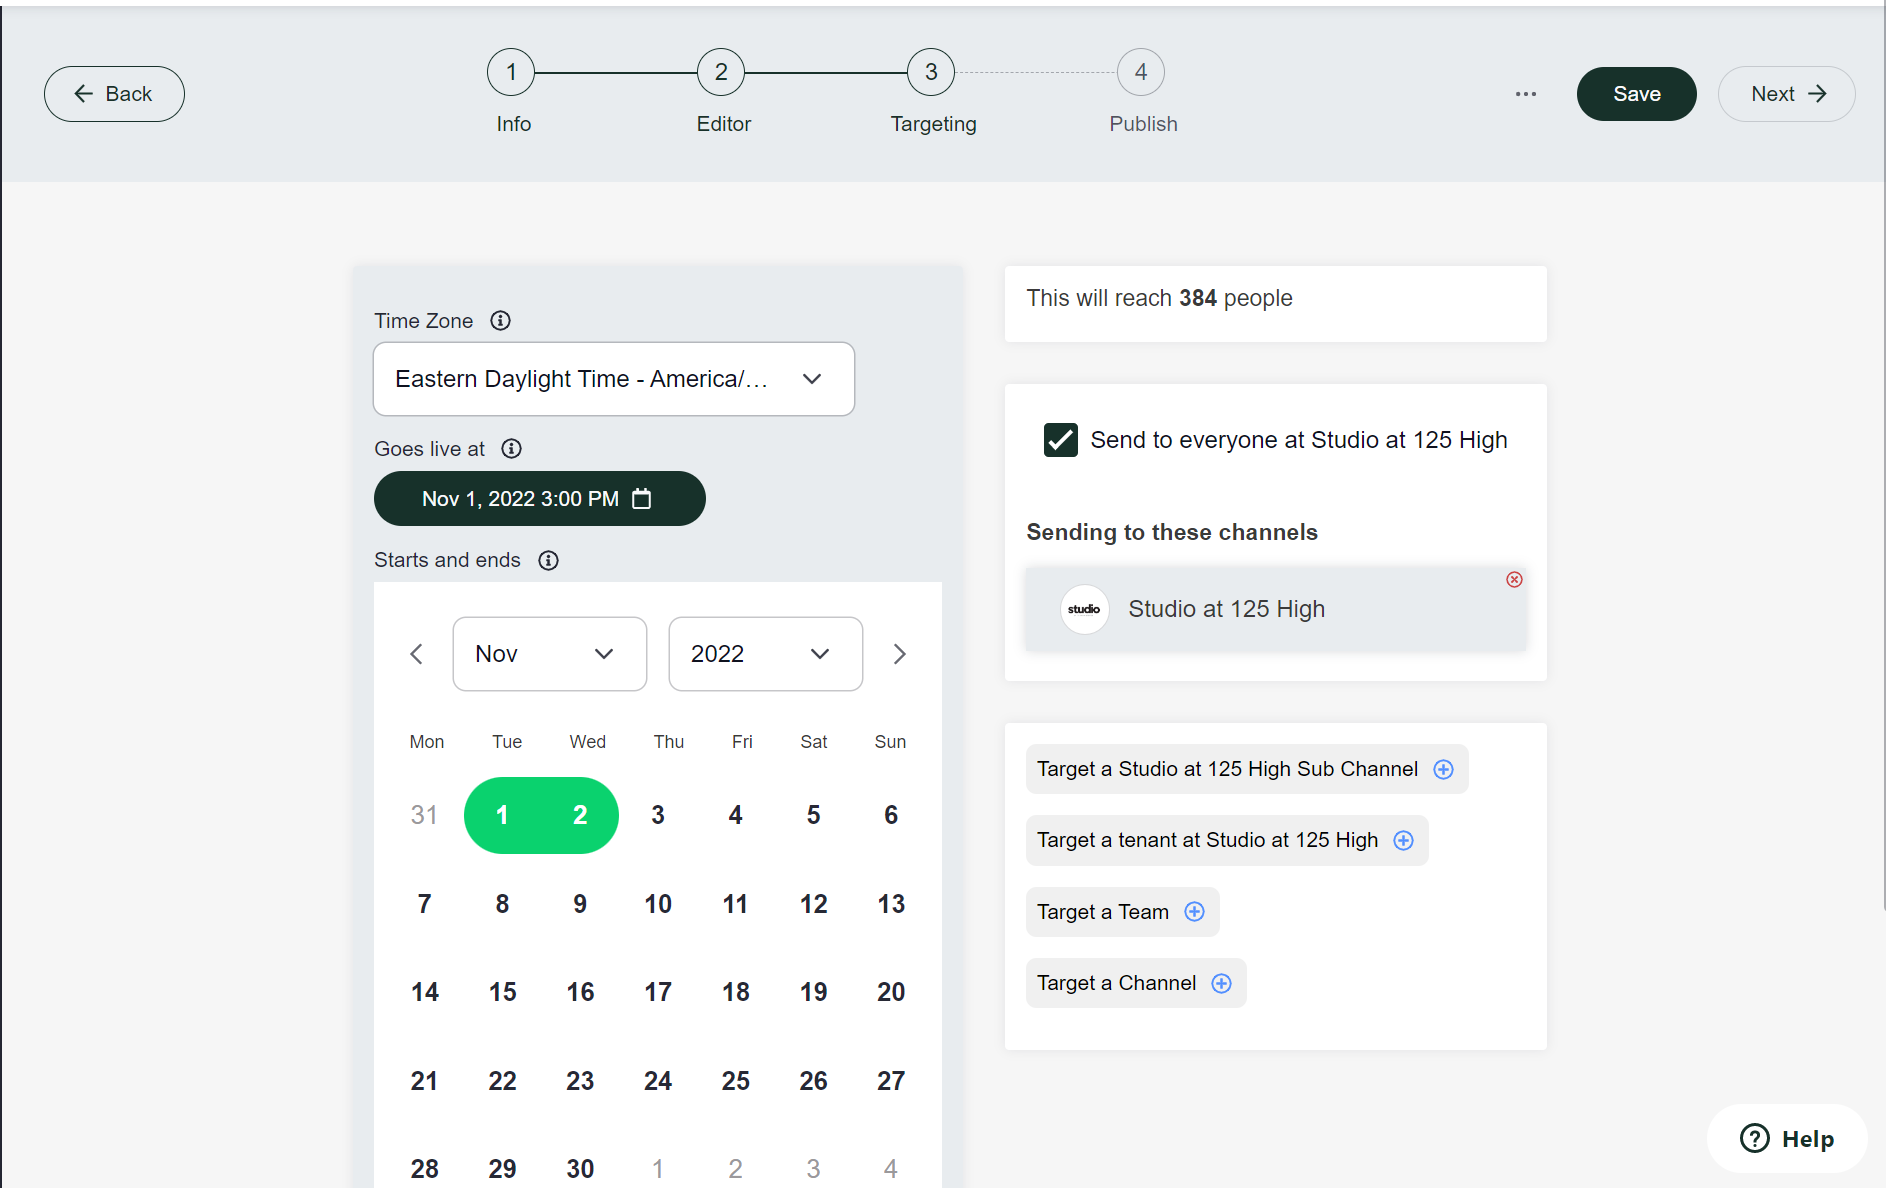
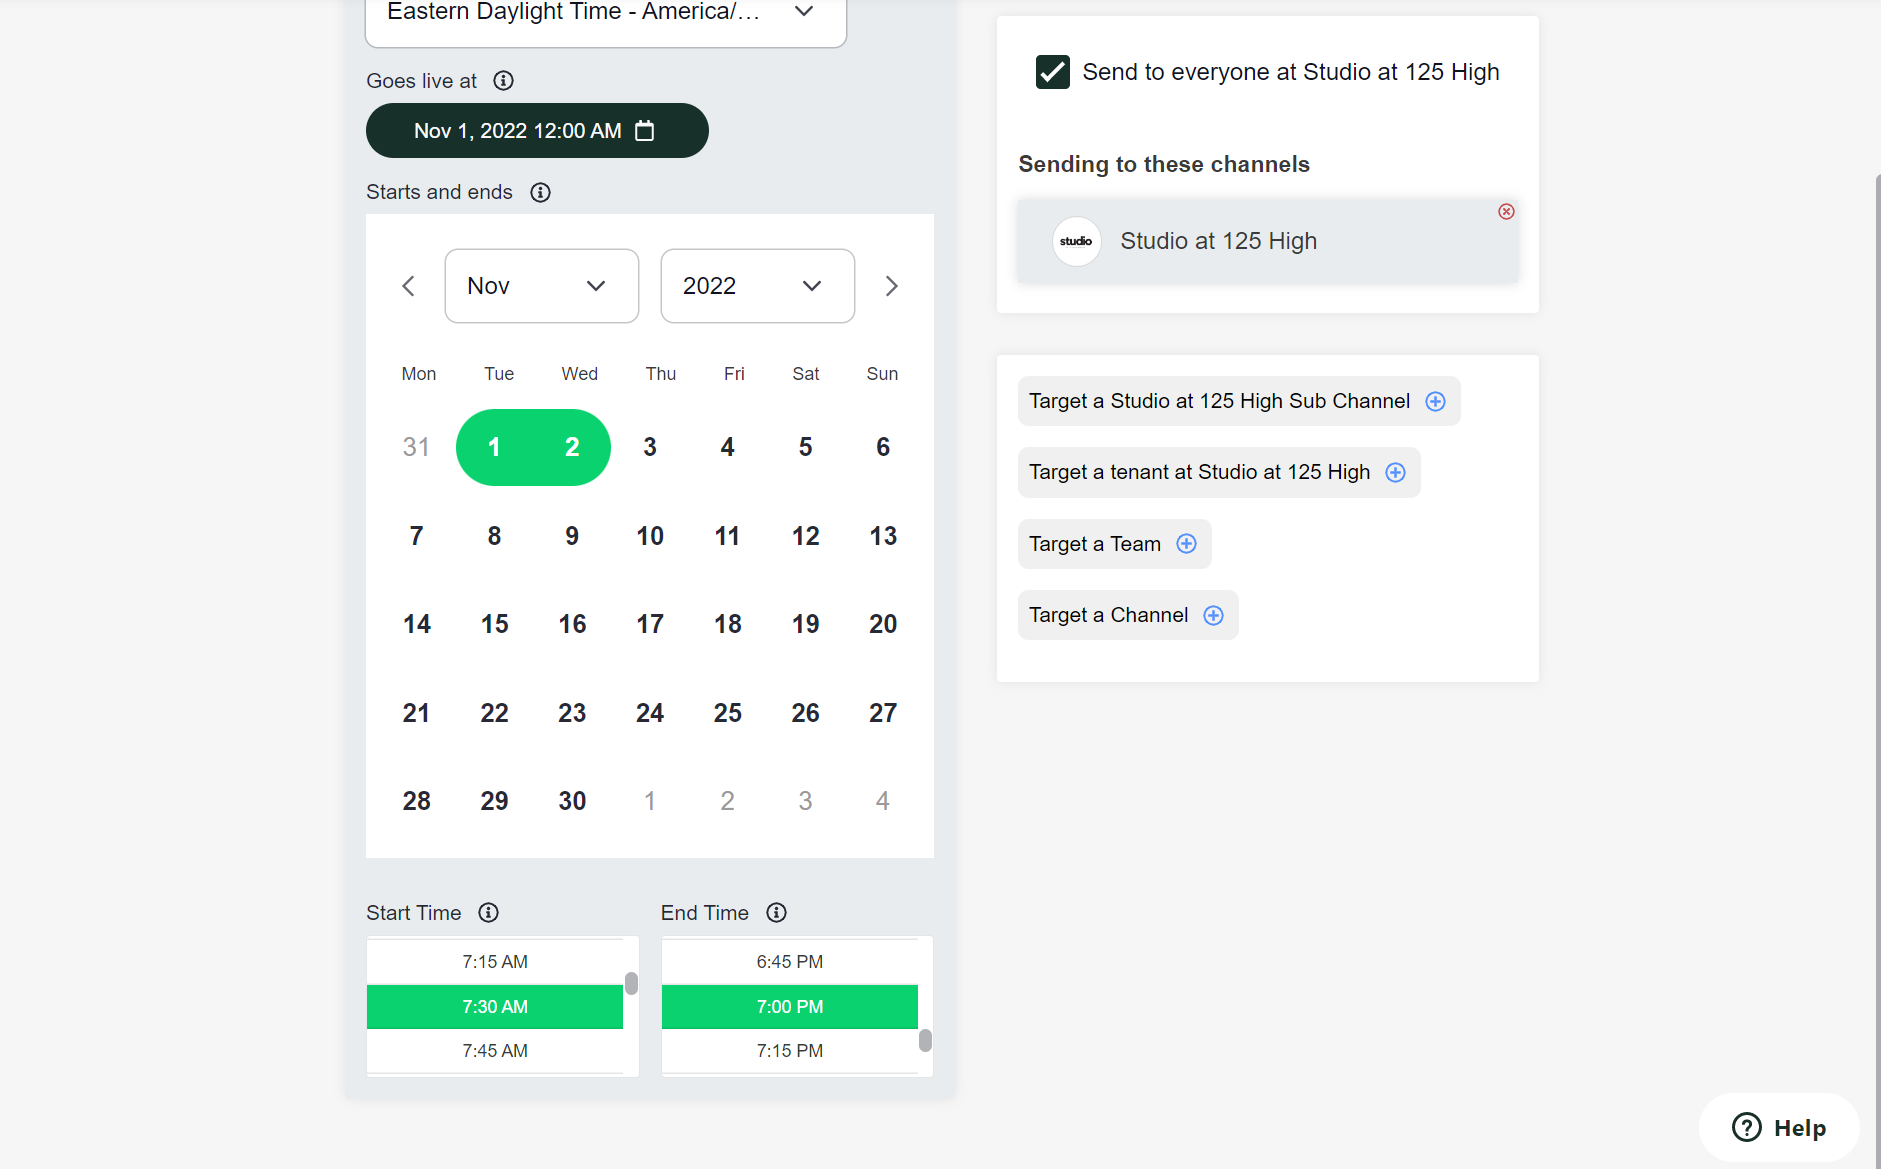
The start/end times should reflect the event. For example, if you have an elevator closure for an entire day, select 12:00AM as the start time, and 11:45PM as the end time. If there is specific timing for an event, use the respective timing.
Step 10: Save the page and select "Next", just like you have for the previous editor pages. You'll now end on the "4: Publish" page. This is where you can opt to send notifications to members.
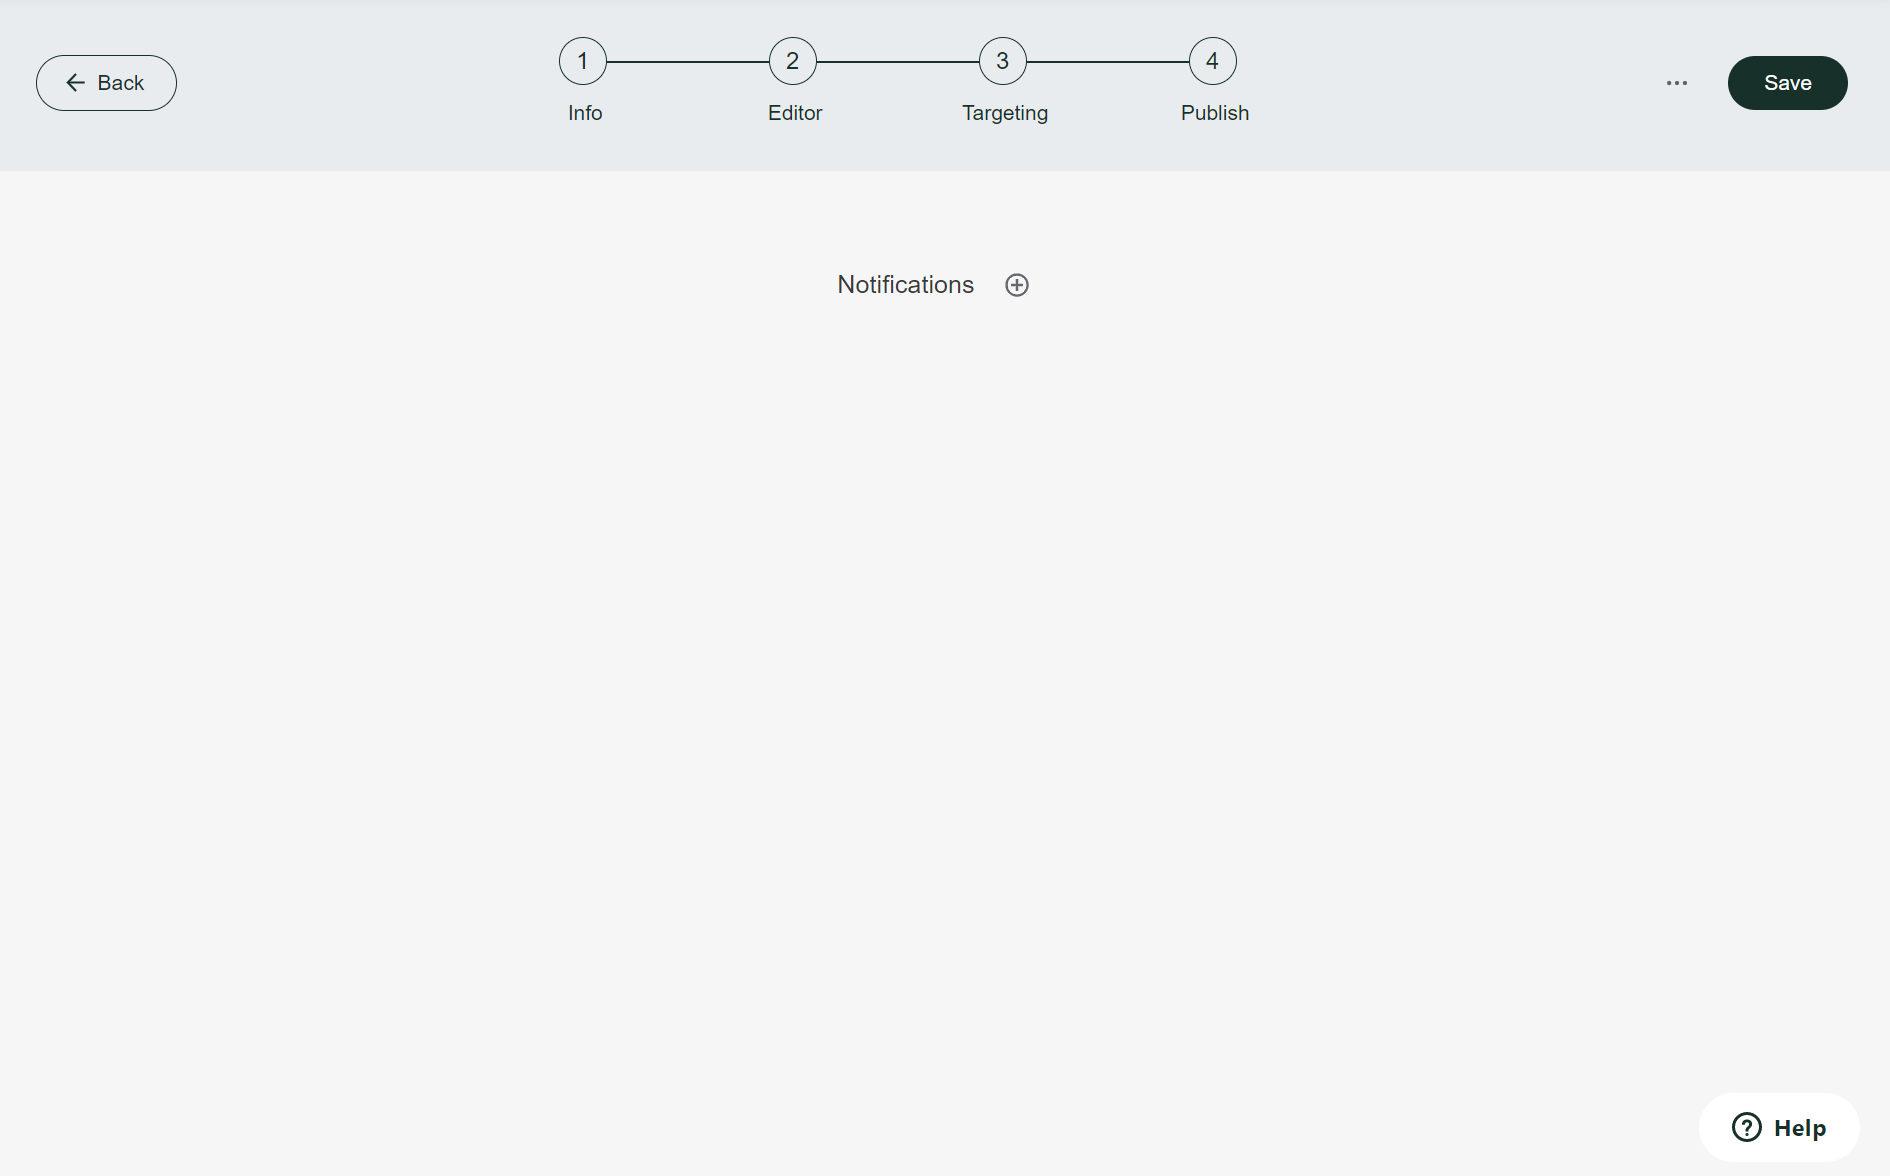
Click on the "+" if you'd like to add a notification. Here you can edit the date/time that members receive the notification, and what you would like it to say.
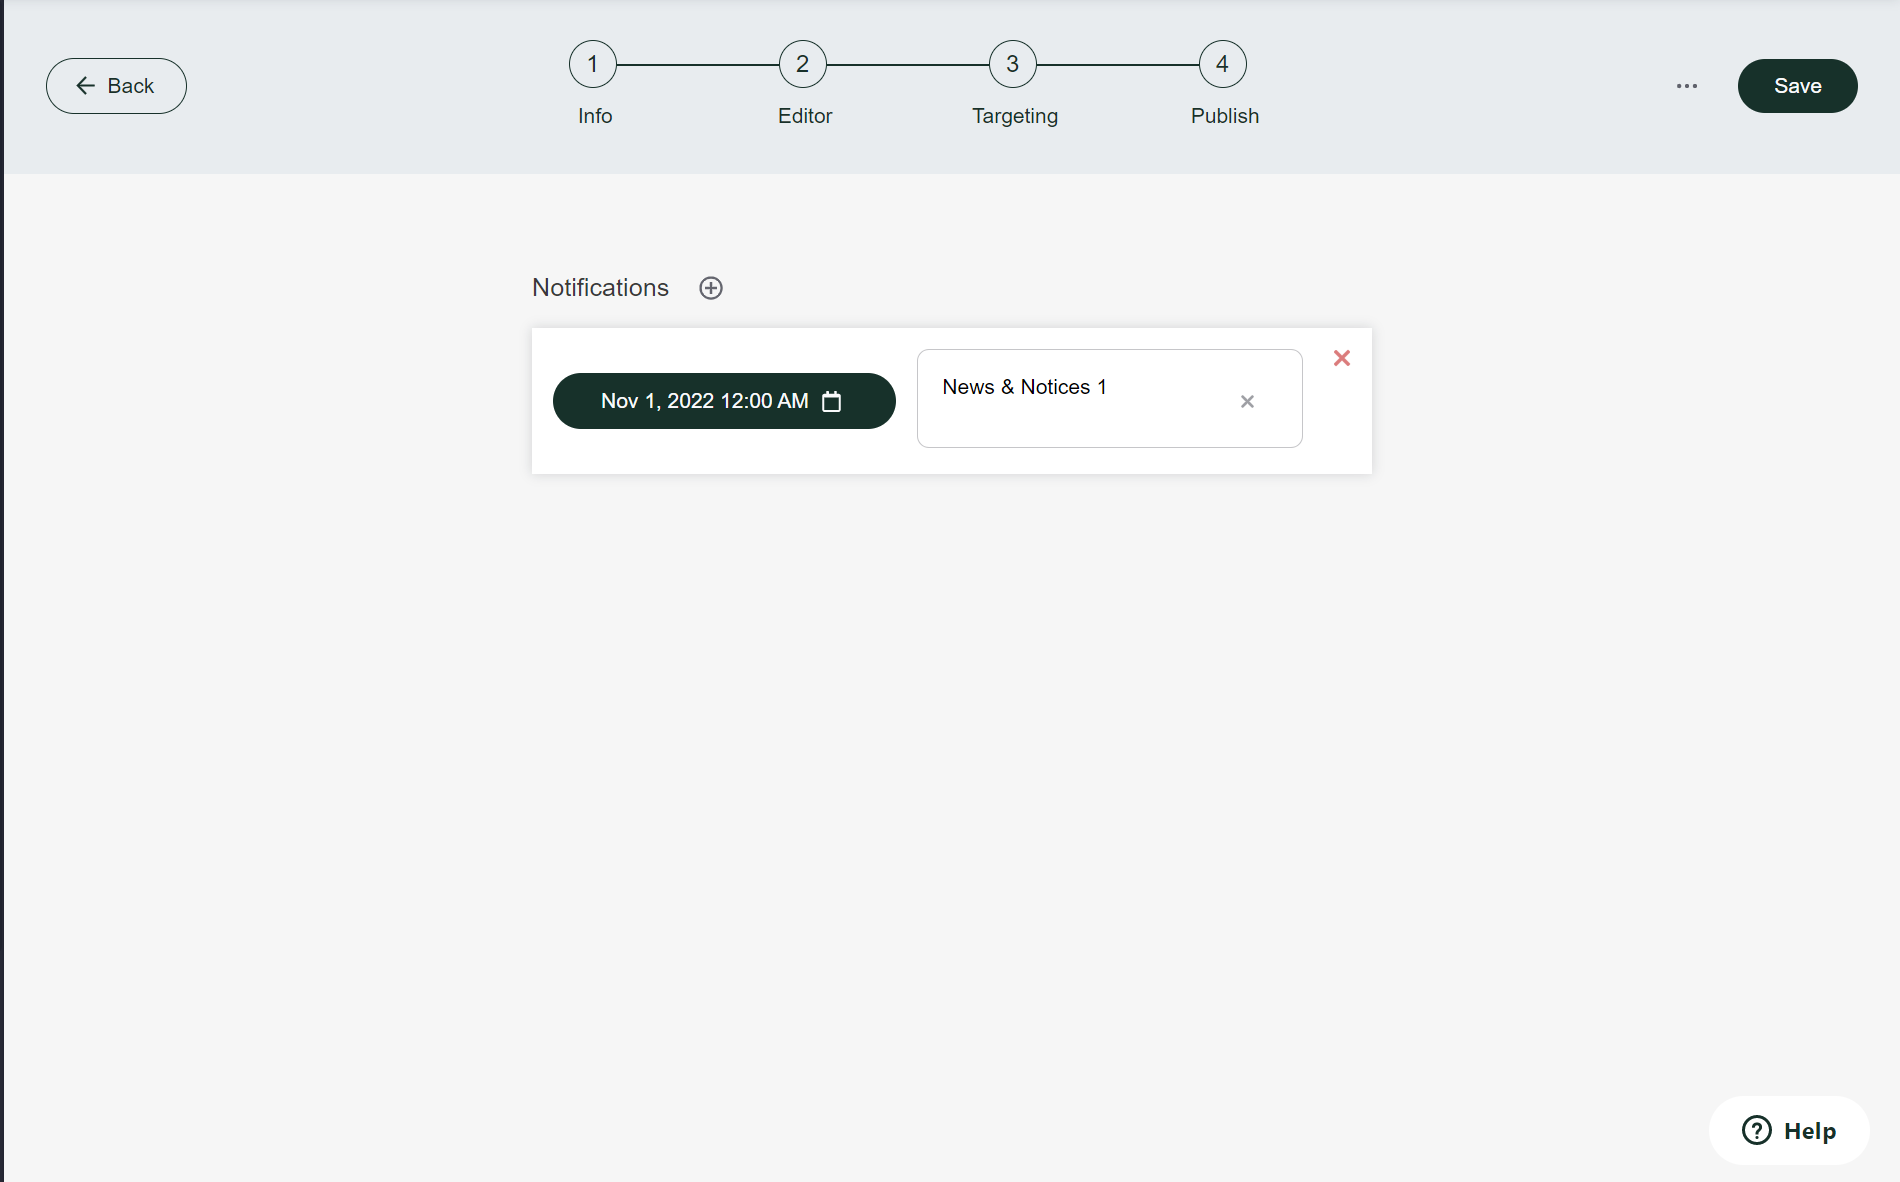
Tip: Try to keep the notification short & sweet! For example: "Elevator closures on 11/1".
Step 11: Once complete, save your tile one last time and you will have the option to publish!
Was this article outdated or incorrect? Suggest a revision! Still need help? Submit a ticket!