
Step 1: If your invoice was sent to you via email, save the invoice as a PDF. Some invoices will be uploaded directly to Basware for you by the vendor.
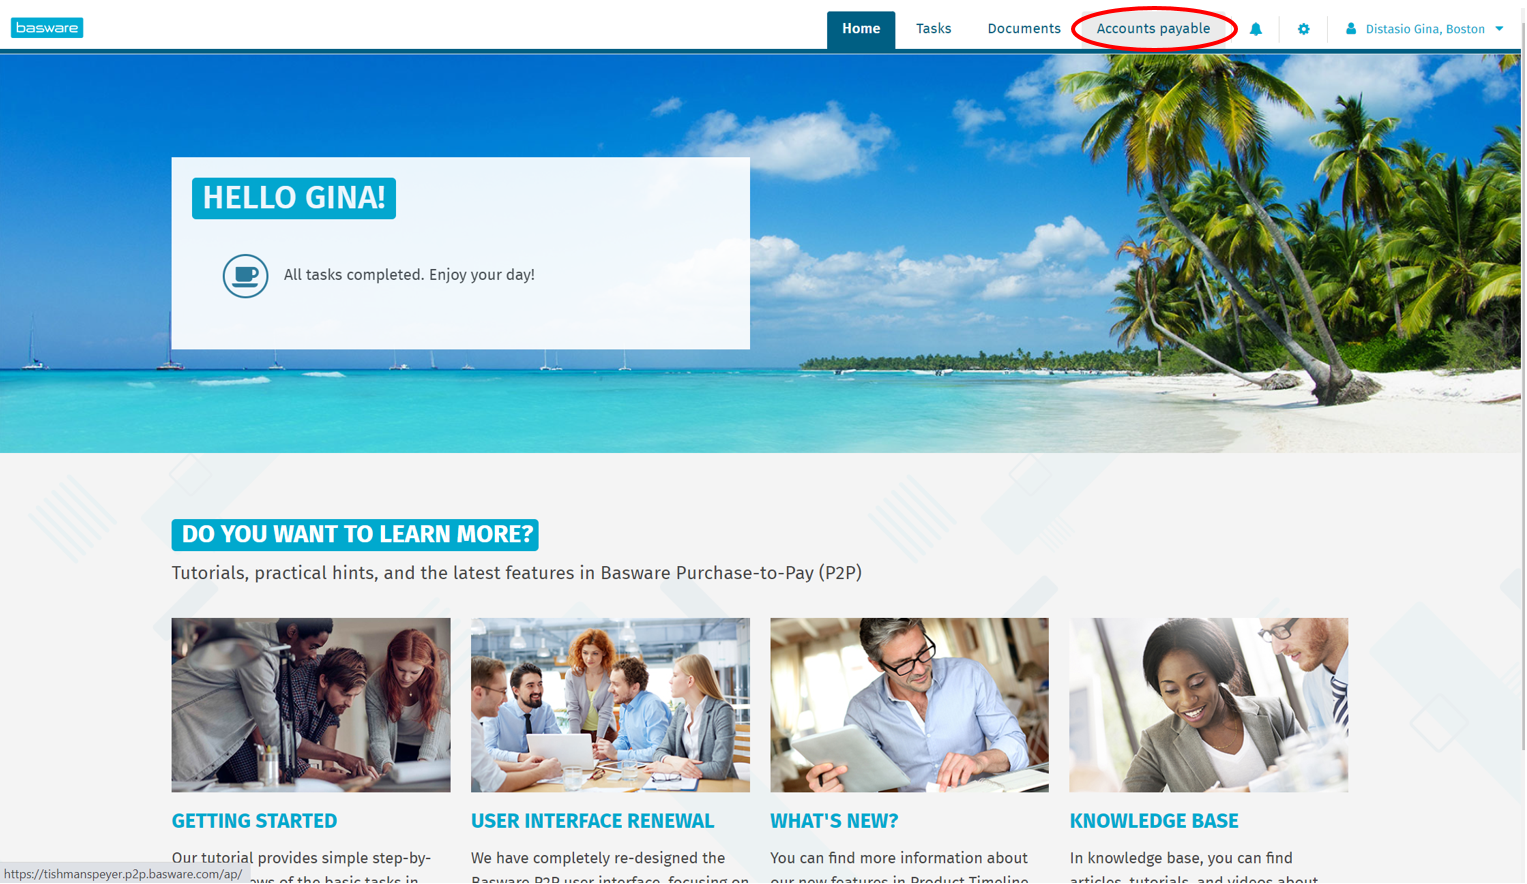
Step 2: Open Basware AP Pro. Click on the "Accounts payable" tab. Here is a link to access Basware.
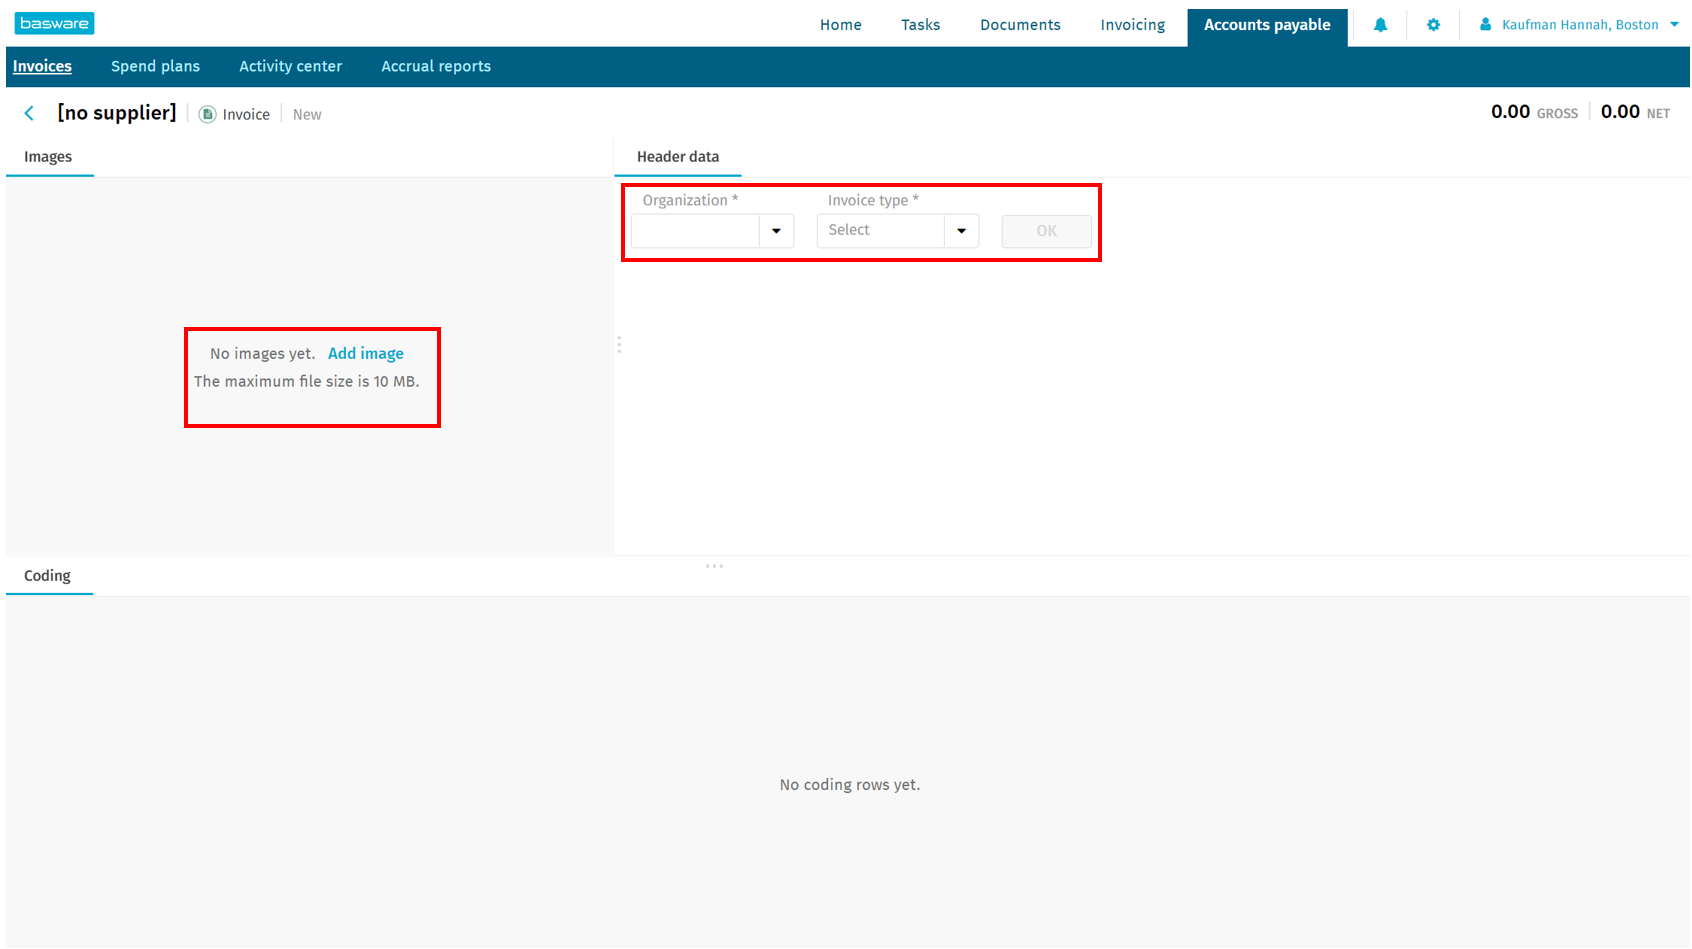
Step 3: If the invoice has been submitted by the vendor, you'll see it on the list of invoices for your location with the sub-status "Draft". To upload an invoice that was emailed to you, select "Create invoice".

Step 4: Enter your organization (your company code), which should autofill "Invoice type" to "Invoice - US". You can now upload the PDF of your invoice by selecting "Add image" and searching your computer for the saved file. Click "OK" once all of this info is entered.
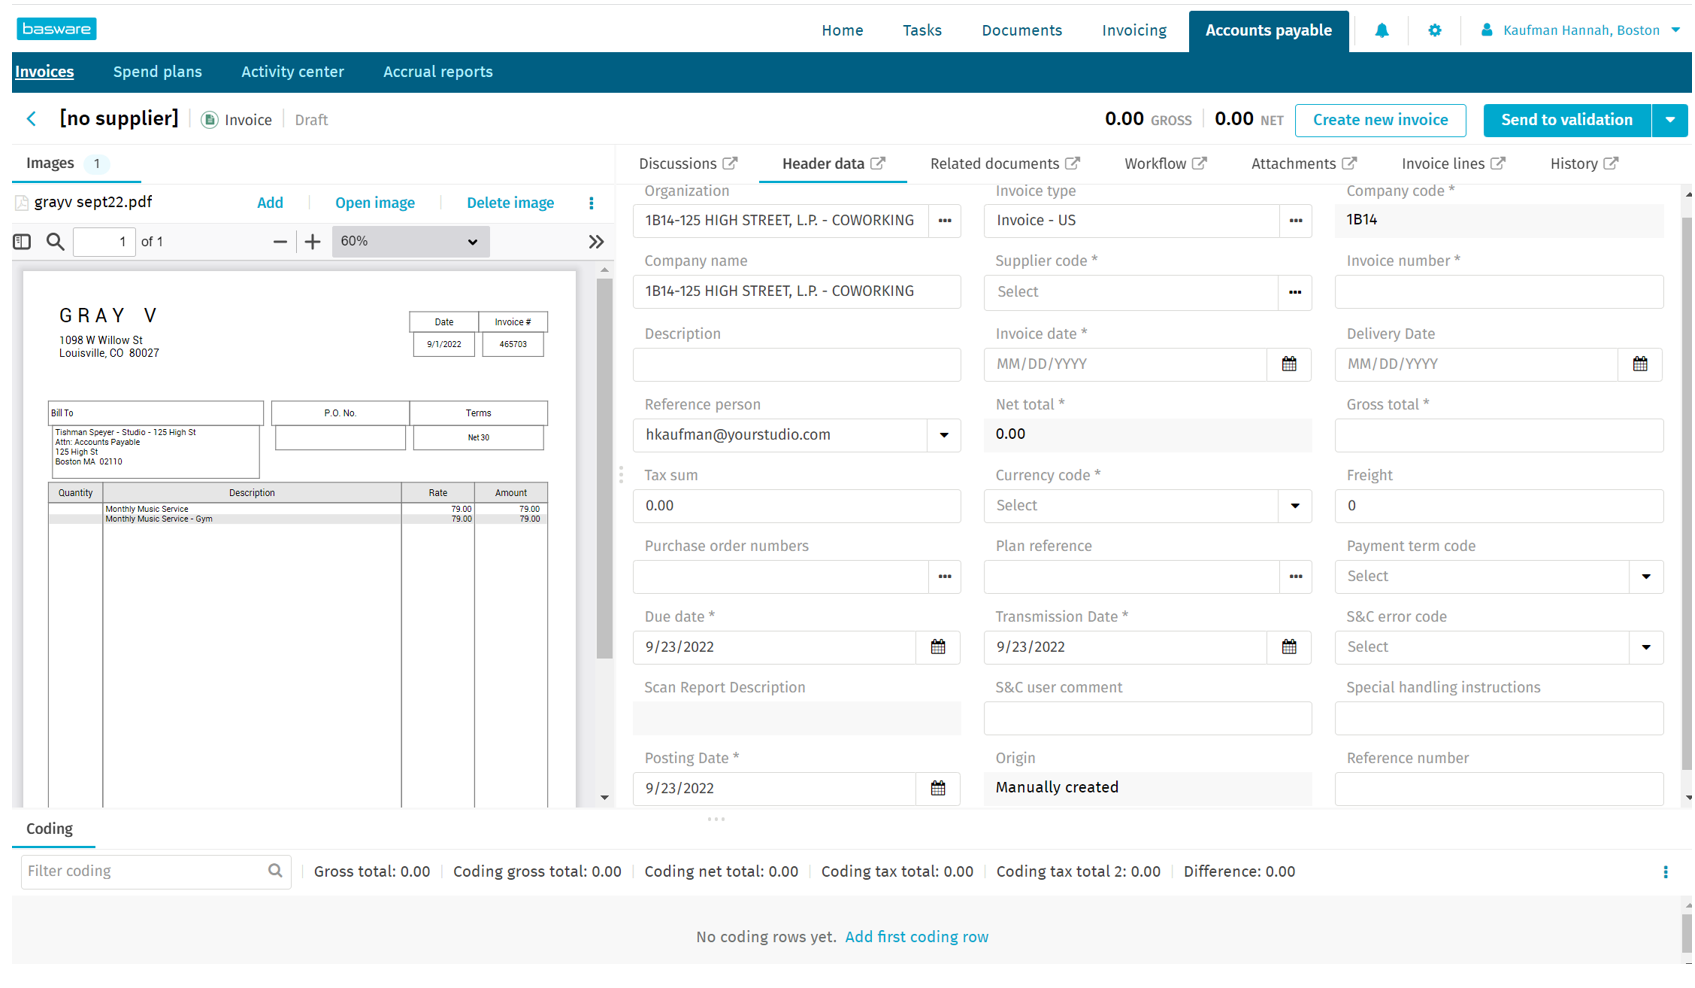
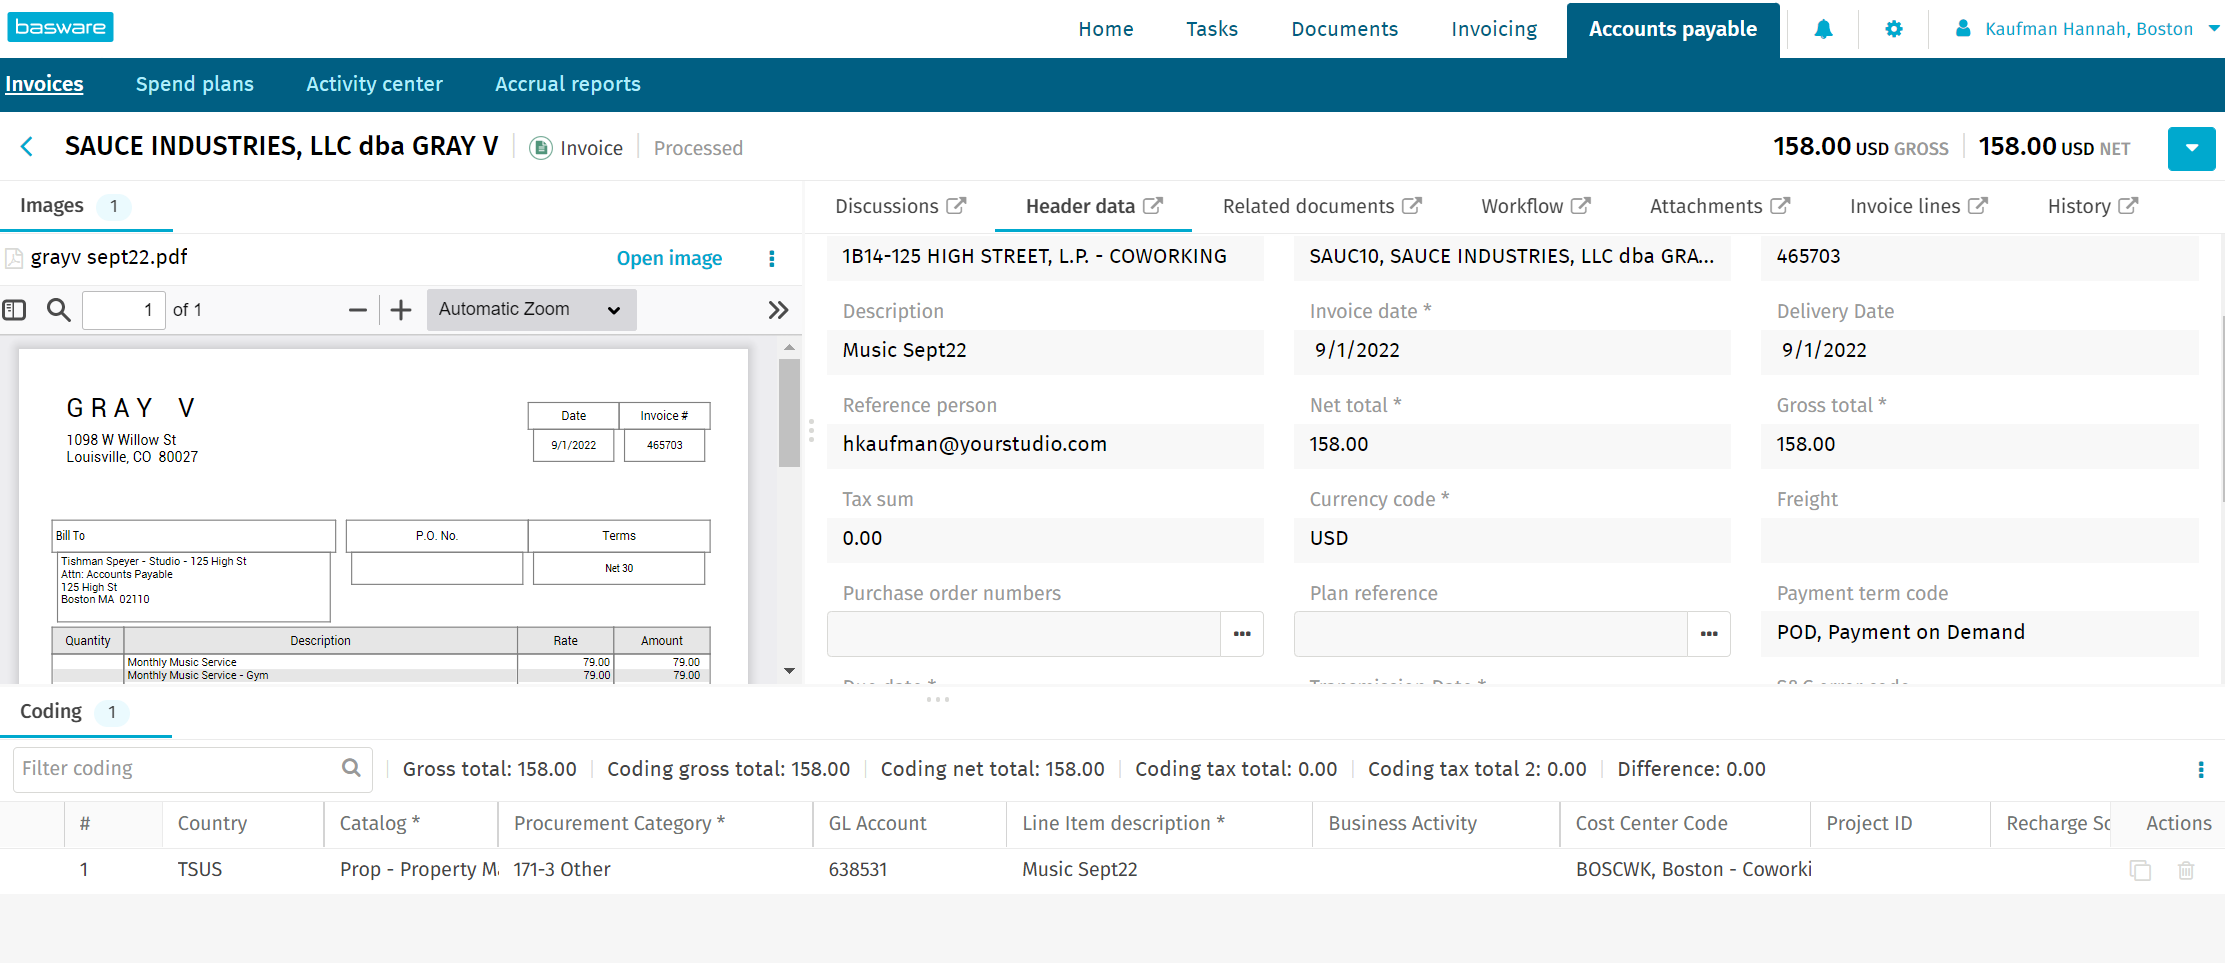
Step 5: Next, you'll fill out the "Header data". Some info will auto-generate for you based on what you entered for your organization in the last step.
Supplier Code: This is the code linked to the vendor you are using. For example, Gray V's vendor code is SAUC10. You can find a list of vendors and their respective supplier codes on Airtable under the "Vendors" tab.
Invoice Number: You should find this on the invoice from the vendor. There are a few exceptions where you have to create your own invoice number, such as the AMEX statement. In these situations, you'll use the last 6 digits of the account number, followed by the numerical sequence of the date (for example, if the invoice came out on 9/23/2022, you would use 092322 as the last 6 digits).
Description: Give a brief explanation of what you are paying and for what date range (for example, "Music Subscription 9/1/22-9/30/22").
Invoice Date: Use the date on the invoice.
Delivery Date: Use the same date as the invoice date.
Gross Total: Enter the total amount due on the invoice.
Currency Code: Should autofill to USD.
Due Date, Transmission Date, and Posting Date: All of these dates should match, and should typically be today's date. The exception to this would be if you receive an invoice BEFORE the invoice date. For example, if you got an October 1st invoice in the last week of September, you'll have these three dates be October 1st.
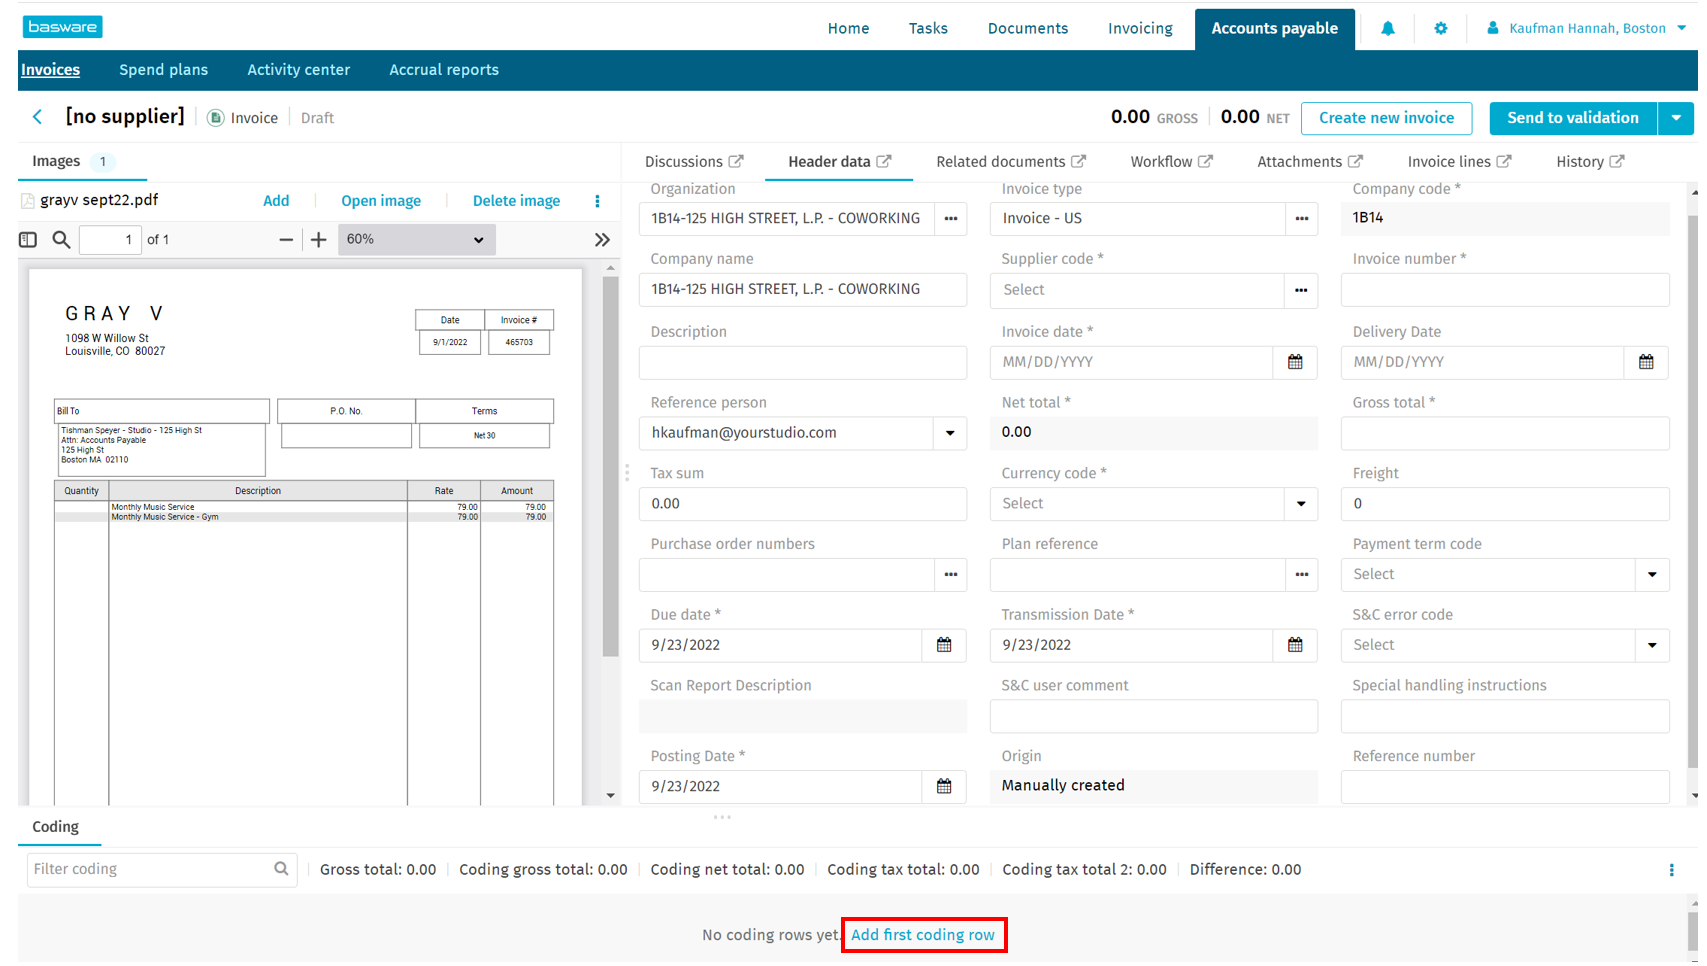
Step 6: Once all of the header data is complete, you'll begin coding. Select "Add first coding row".
Step 7: A coding row will appear. Enter the following info for each coding line:
Catalog: Select "Prop - Property Management".
Procurement Category: You can find a list of commonly used procurement categories on Airtable under the "Vendors" tab.
GL Account: This will autofill after you enter the procurement category.
Item Line Description: This will autofill from the description in the header data. You can edit if you have multiple coding lines.
Cost Center Code: This is exclusive to your property.
Net & Gross Totals: If you scroll to the right on your coding line, you'll see where you can enter the totals for either the entire invoice, or for individual lines if there are more than one.
Step 8: Review all of the information entered. Make sure totals match. Click "Save" in the top right corner. Then click "Send to validation" to send the invoice to header review.
Was this article outdated or incorrect? Suggest a revision! Still need help? Submit a ticket!